- How to create a balloon backdrop on a budget?
- What supplies do you need for DIY balloon decorations?
- How to make an elegant balloon garland?
- What are the steps to build a balloon arch?
- How to assemble balloon backdrops and photo walls?
- How to customize your balloon decor for events?
- Related Questions About Creating Balloon Backdrops
- Frequently Asked Questions about balloon photo backdrops
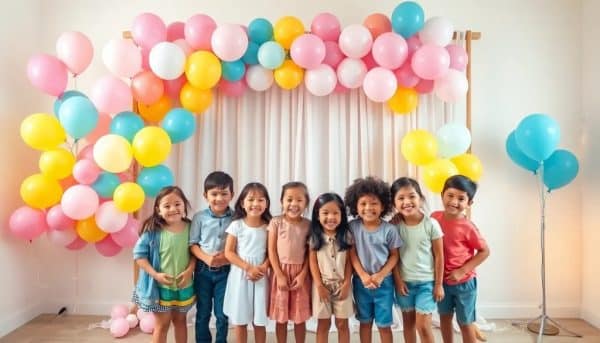
Are you looking to add a pop of color and fun to your next event without breaking the bank? Creating balloon photo backdrops on a budget is the perfect solution! With a bit of creativity and some DIY spirit, you can craft stunning decorations that will leave your guests in awe.
In this guide, we'll explore various techniques, supplies needed, and tips for creating beautiful balloon backdrops that won't dent your wallet. Whether it's for a birthday party, wedding, or any celebration, let's dive in!
How to create a balloon backdrop on a budget?
To start your journey of creating balloon photo backdrops on a budget, you need to gather some essential supplies. This includes balloons of various sizes and colors, a sturdy base like a garment rack, and some ribbons for finishing touches.
Think about the color scheme of your event. Choose colors that complement your overall theme, and don't hesitate to mix and match for a vibrant look. Once you have your supplies, you can start inflating the balloons. An electric inflator will save you time and energy.
Next, attach the inflated balloons to your base using ribbons or adhesive. Get creative with arrangements—cluster some balloons together for depth, or create patterns to make your backdrop visually appealing. The goal is to make it eye-catching yet cohesive.
What supplies do you need for DIY balloon decorations?
When it comes to DIY balloon decorations, having the right supplies is crucial. Here’s a quick list of what you’ll need:
- Balloons in various sizes
- Ribbons or string
- Garment racks or frames
- A balloon pump or electric inflator
- Scissors and tape
Each of these items plays a vital role in ensuring your backdrop stands out. The balloons are, of course, the centerpiece, while the frame provides stability. Ribbons and tape will help you secure everything in place.
Don’t forget to consider your event's theme. You can mix and match colors and sizes to create a playful and inviting atmosphere. For instance, pastel colors work beautifully for baby showers, while vibrant hues are perfect for birthday parties.
How to make an elegant balloon garland?
Creating an elegant balloon garland is a fantastic way to enhance your backdrop. Start with a variety of balloons, including some foil options for a touch of glam. Begin by inflating your balloons, but keep them at different sizes for a more organic look.
Once inflated, use a long piece of fishing line or string. Start tying balloons together, alternating sizes and colors as you go. This technique adds texture and visual interest. You may also consider adding greenery or flowers for added elegance.
After assembling your garland, you can drape it along your balloon backdrop or around the edges. This will create a stunning framing effect, perfect for those photo opportunities!
What are the steps to build a balloon arch?
Building a balloon arch might sound daunting, but it's quite straightforward. First, gather your balloons and a sturdy frame or base to support the arch, such as PVC pipes or a pre-made arch kit.
Begin by inflating your balloons, ensuring to have a mix of sizes for a fuller appearance. Once inflated, start attaching the balloons to your frame, securing them with string or wire. It's recommended to start from the bottom and work your way up for a balanced look.
- Choose a base and secure it firmly.
- Inflate balloons of different sizes.
- Attach the balloons, alternating colors and sizes.
- Fill in gaps with smaller balloons.
- Secure the arch to prevent falling.
With patience and creativity, your balloon arch will become the centerpiece of your event, providing a perfect backdrop for photos.
How to assemble balloon backdrops and photo walls?
Assembling a balloon backdrop or photo wall is an easy and enjoyable process. Start by defining the area where you want your backdrop set up. This can be a wall, frame, or even a freestanding structure.
After preparing your area, begin inflating the balloons. As you start attaching them, think about your design. You can create a random pattern, or opt for an organized layout for a more polished look.
For added interest, consider layering balloons. Start with larger balloons at the base, and fill in with smaller ones on top. This creates depth and dimension. Use adhesive dots or tape to secure each balloon in place, ensuring they stay put throughout the event.
How to customize your balloon decor for events?
Customizing your balloon decor is where your creativity shines. Incorporate elements that reflect the theme of your event, such as personalized banners, photos, or even themed balloon shapes.
Consider color coordination with table settings or other decorations to create a cohesive look. You can also add embellishments like feathers, lights, or greenery to elevate your balloon installations.
- Add personalized banners or messages.
- Use colors that match your theme.
- Incorporate flowers or foliage.
- Try unique shapes for balloons.
- Consider adding lights for evening events.
The more you personalize your decor, the more it will resonate with your guests and create a memorable experience.
Frequently Asked Questions about balloon photo backdrops
What can I use as a base for a balloon arch?
For a sturdy base for your balloon arch, you can use PVC pipes, metal frames, or even sturdy cardboard. Ensure that whatever base you choose can support the weight of the balloons. If you're opting for a temporary solution, large flower pots filled with sand or rocks can also work well.
Another popular choice is to purchase a pre-made balloon arch kit, which often comes with a frame designed specifically for balloon arrangements. This will simplify your process and ensure stability.
How to make your own balloon display?
Making your own balloon display involves planning your design, gathering supplies, and assembling the balloons. Start by deciding on a theme and color scheme.
Once your balloons are inflated, arrange them in clusters or patterns, securing them with tape or ribbons. Using a sturdy backdrop can enhance the overall look. Consider incorporating additional elements like streamers or lights for extra flair.
How to create a backdrop DIY?
To create a DIY balloon backdrop, first select a suitable location, then gather your materials, including balloons, a frame, and any decorative elements. Inflate your balloons and begin attaching them to your frame in your desired pattern.
Ensure to fill in gaps with smaller balloons or other decorations. This DIY project can be customized according to your event, making it not only cost-effective but also uniquely tailored to your celebration.
How many balloons for a balloon backdrop?
The number of balloons required for a backdrop can vary based on the size of the area you're decorating. Typically, a good estimate is about 50-100 balloons for a standard-sized backdrop. This ensures a full and lively appearance.
For larger displays, you may want to use up to 150 balloons or more. Always keep in mind the overall design and density you wish to achieve. Remember, it's better to have a few extra balloons than to find yourself short!
Para quienes buscan maneras creativas y económicas de embellecer sus eventos, a continuación, les presentamos un video que explora cómo crear fondos fotográficos con globos sin gastar mucho dinero.

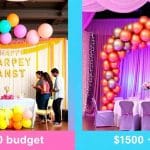 Balloon decoration for different budgets: what $100 vs $500 gets you
 The ultimate guide to creating a balloon wall on a budget
 Balloon decoration for outdoor events in Barcelona
Please note that all prices displayed on this website are for reference only. Final pricing may vary depending on the specific decoration requirements, materials, and event details. Contact us for a personalized quote tailored to your unique celebration!
Deja una respuesta