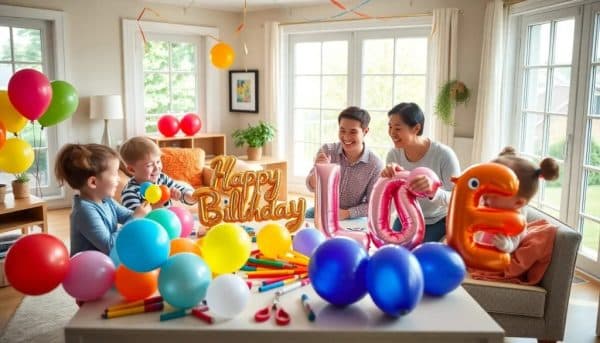
Creating beautiful and personalized decorations for special events has never been easier. One popular trend is to create dimensional balloon letters that can add a festive touch to any gathering. This guide will focus on how to create dimensional balloon letters without special equipment, making it accessible for everyone.Balloon boxes are a fantastic way to display messages for birthdays, baby showers, and other celebrations. This article will walk you through the steps to make your own DIY balloon boxes with letters, ensuring your event stands out. Now, let's dive into the process!
How to create dimensional balloon letters without special equipment
When it comes to creating dimensional balloon letters, the process can be both fun and straightforward. You can achieve stunning results without needing specialized tools. Start by gathering your materials and following some simple techniques.First, choose your balloons. Opt for a variety of colors that match your event theme. When inflated, these balloons can be arranged to form letters or words. Next, consider the size of your letters. You can sketch out the desired shapes on paper or use templates to guide you as you arrange the balloons. This is a crucial step to ensure visual appeal and balance.Another tip is to use double-sided tape or glue dots to secure your balloons in place. This prevents them from shifting and keeps your letters looking neat throughout the event.How to print and apply vinyl stickers on balloons?
Vinyl stickers can add a personalized touch to your balloon decorations. Using removable vinyl for this task is crucial, as it will allow you to adjust or remove stickers without damaging the balloons.Begin by designing your stickers. You can use design software or apps to create custom messages or images. Once your designs are ready, print them on adhesive vinyl sheets. After cutting out your stickers, peel them off and carefully apply them to the balloons. It is best to apply them to smooth surfaces and avoid placing them on inflated areas to prevent popping.Adding vinyl stickers can elevate your balloon decor to new heights. They can also be used to create themed decorations or even fun wording that resonates with your event's spirit.How to make 3D paper letters: full alphabet, numbers & symbols?
Creating 3D paper letters is an excellent way to enhance your balloon displays. These letters can serve as a backdrop or complement your balloon boxes. To get started, gather materials like kraftboard, scissors, and adhesive. You can find templates online for the full alphabet, numbers, and even symbols.Follow these steps to make your 3D letters:- Print and cut out the templates of the letters you need.
- Trace the templates onto the kraftboard and cut out the shapes.
- Fold the edges of each letter to create depth.
- Glue or tape the edges together to secure the structure.
What materials and tools do you need to make DIY balloon boxes with letters?
To create stunning DIY balloon boxes, it’s essential to have the right materials. Here’s a comprehensive list to help you get started:- Kraftboard: This sturdy material forms the base of your balloon boxes.
- Balloons: Choose a variety of colors and sizes to fill your boxes.
- Vinyl: For personalizing your balloon boxes with messages.
- Hot glue gun: This is useful for assembling your boxes and attaching letters.
- Scissors and a craft knife: Necessary for cutting kraftboard and balloons.
- Tape: Double-sided tape works well for securing decorations.
How to create DIY letter boxes?
Creating DIY letter boxes can be an enjoyable and creative process. Here’s a step-by-step guide to help you make your own:1. Design the Layout: Start by deciding the size of your letter boxes and how many letters you need to display. Sketching out your ideas can be helpful.2. Cut the Kraftboard: Measure and cut the kraftboard according to your design. Be precise to ensure the boxes fit well together.3. Assemble the Boxes: Use hot glue to secure the sides of the boxes together. Make sure they are stable enough to hold the balloons.4. Decorate the Boxes: Once assembled, you can paint or cover the boxes with decorative paper. This will enhance their appearance and make them more festive.5. Fill with Balloons: Inflate your balloons and place them inside the boxes. This will create a vibrant and festive look.By following these steps, you can create stunning DIY letter boxes that will impress your guests and enhance any event.What are the answers to your questions about DIY balloon boxes with letters?
How to make letters balloon?
Making balloon letters involves inflating balloons and arranging them in the shape of letters. You can use templates to guide your designs. For secure placement, consider using double-sided tape to adhere the balloons together.How to make your own balloon display?
To create a balloon display, start with a theme or message. Choose the right colors and sizes for your balloons. You can arrange them on a table, within boxes, or create an arch. Use strong adhesives to keep everything in place.How to make big letters for decorations?
To create large letters, you can use cardboard or foam board to cut out letter shapes. Decorate them with balloons or craft materials. Ensure they are sturdy enough to stand alone or be displayed on a table.How to make a balloon arch without stand or helium?
Creating a balloon arch without a stand or helium can be done by using a long piece of string or fishing line. Inflate your balloons and tie them in clusters. Then, attach the clusters to the string, creating a beautiful arch that can be secured to walls or other structures.How can you get free SVG files for DIY balloon boxes with letters?
There are numerous online resources where you can find free SVG files for creating DIY balloon boxes. Websites like Creative Fabrica and Freepik offer a variety of designs you can download and use with your crafting projects.Simply search for "free SVG files for balloon letters" and explore the options available. Ensure that you check the licensing to confirm you can use the designs for your intended purpose.How to save this tutorial on Pinterest?
To save this tutorial on Pinterest, you can create a captivating pin by capturing an image of your finished balloon boxes or a screenshot of this guide. Click on the Pinterest 'Save' button and select your desired board to keep track of this valuable information.By pinning this tutorial, you’ll have a quick reference as you create your beautiful balloon decorations!Menu
Creating DIY balloon boxes with letters can be a delightful project that enhances your event's decor. By following the steps and tips provided, you’ll be able to craft stunning displays that impress your guests and make your celebrations memorable. Happy crafting!- How to create dimensional balloon letters without special equipment
- How to print and apply vinyl stickers on balloons?
- How to make 3D paper letters: full alphabet, numbers & symbols?
- What materials and tools do you need to make DIY balloon boxes with letters?
- How to create DIY letter boxes?
- What are the answers to your questions about DIY balloon boxes with letters?
- How can you get free SVG files for DIY balloon boxes with letters?
- How to save this tutorial on Pinterest?
En este sentido, te presentamos un video que te enseñará cómo crear letras de globos dimensionales sin necesidad de contar con equipos especiales.

Please note that all prices displayed on this website are for reference only. Final pricing may vary depending on the specific decoration requirements, materials, and event details. Contact us for a personalized quote tailored to your unique celebration!
Deja una respuesta